I’ve been baking for over fifteen years, and I can honestly say that these Big Blue Monster Stuffed Cookies are among the most delightful treats I’ve ever created. When my daughter first requested “Cookie Monster cookies” for her birthday party, I knew I had to go beyond simple blue frosting. These oversized, vibrant blue cookies stuffed with chocolate chips and mini cookies create an experience that’s both visually stunning and incredibly delicious.
The magic happens when you bite into these seemingly ordinary blue cookies and discover the treasure trove of goodies hidden inside. Each cookie contains a generous filling of chocolate chips, mini vanilla wafers, and sometimes even crushed Oreos, creating multiple textures and flavors that dance on your palate. The result is a cookie that’s part dessert, part entertainment, and completely irresistible.
Understanding the Big Blue Monster Cookie Concept
Monster Cookie : A large, oversized cookie typically measuring 4-6 inches in diameter, packed with multiple mix-ins and designed to be shared or savored slowly
Stuffed Cookie : A cookie technique where one layer of dough encases a filling, creating a surprise center when bitten
Blue Food Coloring Types : Gel food coloring provides the most vibrant color without affecting dough consistency, while liquid coloring may require flour adjustments
Cookie Spread Control : The technique of chilling dough and using specific fat ratios to prevent cookies from spreading too much during baking
Essential Ingredients and Their Roles
My recipe relies on carefully selected ingredients that work together to create the perfect texture and flavor balance. The foundation starts with high-quality butter that I always bring to room temperature for optimal creaming. I use a combination of brown and white sugar because the brown sugar adds moisture and chewiness, while white sugar contributes to the cookie’s structure and helps achieve those beautiful crackled edges.
The secret to achieving that vibrant Cookie Monster blue lies in using gel food coloring rather than liquid. I typically use about 1-2 teaspoons of royal blue gel coloring, which gives me that perfect shade without compromising the dough’s consistency. Liquid food coloring can make the dough too wet, resulting in cookies that spread excessively during baking.
For the flour, I exclusively use all-purpose flour and measure it properly by spooning it into the measuring cup and leveling it off. Too much flour creates dense, heavy cookies, while too little results in cookies that spread too thin. The eggs I use are always large and at room temperature, which helps them incorporate more easily into the butter-sugar mixture.
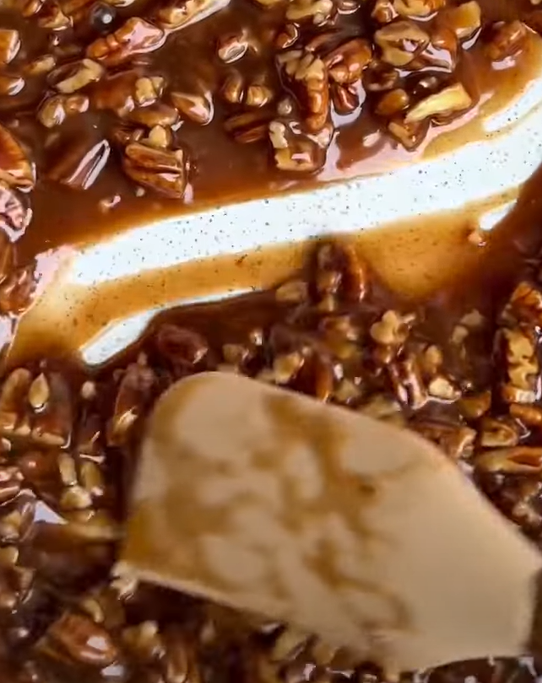
The Magic of Cookie Stuffing
The stuffing component is where creativity truly shines. My go-to combination includes mini chocolate chips, crushed vanilla wafers, and small pieces of chocolate sandwich cookies. However, I’ve experimented with numerous variations over the years, and each brings its own character to the final product.
Mini chocolate chips work better than regular-sized chips because they distribute more evenly throughout the cookie and don’t create weak spots that might cause the cookie to break. I prefer semi-sweet chips, but dark chocolate chips add a sophisticated depth that adult palates particularly appreciate.
Vanilla wafers contribute a delightful crunch and subtle vanilla flavor that complements the cookie base beautifully. I crush them into irregular pieces about the size of chocolate chips, ensuring some variation in texture. The key is not pulverizing them completely – you want recognizable pieces that provide textural interest.
Step-by-Step Baking Process
The preparation begins with creaming butter and sugars until the mixture becomes light and fluffy, which typically takes about 4-5 minutes with an electric mixer. This step is crucial because it incorporates air into the mixture, contributing to the cookie’s final texture. I can tell when it’s ready because the mixture lightens in color and increases slightly in volume.
Next, I add eggs one at a time, beating well after each addition. This ensures proper emulsification and prevents the mixture from curdling. The vanilla extract goes in with the last egg, and I always use pure vanilla extract rather than imitation for the best flavor.
The food coloring comes next, and this is where the transformation happens. I start with about one teaspoon of gel coloring and mix thoroughly before assessing the color. The goal is achieving that iconic Cookie Monster blue – vibrant but not so intense that it looks artificial. Sometimes I need to add a tiny amount of green gel coloring to get the perfect shade.
For the dry ingredients, I whisk together flour, baking soda, and salt in a separate bowl before gradually adding them to the wet mixture. I mix just until the ingredients are combined because overmixing develops too much gluten, resulting in tough cookies.
The stuffing mixture gets folded in gently at the end. I find that using a large spoon or spatula works better than the mixer for this step, as it prevents over-incorporation while ensuring even distribution.
Advanced Techniques for Perfect Results
Temperature control plays a vital role in achieving the ideal cookie texture. I always chill my dough for at least 30 minutes before shaping, which prevents excessive spreading and helps the cookies maintain their thickness. During hot summer months, I sometimes chill the dough for up to two hours.
When shaping the cookies, I use a large cookie scoop or ice cream scoop to ensure uniform size. Each cookie should weigh approximately 3-4 ounces for that true “monster” size. I place them at least 3 inches apart on the baking sheet because these cookies spread considerably during baking.
The baking process requires careful attention to timing and visual cues. I preheat my oven to 350°F and use heavy-duty baking sheets lined with parchment paper. The cookies typically bake for 12-15 minutes, but I watch for the edges to set while the centers still look slightly underbaked. This ensures they’ll be perfectly chewy once cooled.
Troubleshooting Common Issues
Over the years, I’ve encountered and solved numerous challenges with these cookies. The most common problem is cookies that spread too much, creating thin, crispy results instead of thick, chewy ones. This usually happens when the butter is too warm, the dough isn’t chilled enough, or the oven temperature is too low.
Color issues occasionally arise, particularly when the blue appears muddy or dull. This typically results from using liquid food coloring instead of gel, or from adding too much coloring at once. I’ve learned to add coloring gradually and to mix thoroughly between additions.
Sometimes the stuffing ingredients sink to the bottom of the cookies during baking. This happens when the dough is too soft or when the stuffing pieces are too heavy. Chilling the dough longer and using appropriately sized mix-ins usually resolves this issue.
Uneven baking can occur when cookies are different sizes or when the oven has hot spots. I always use a cookie scoop for uniform sizing and rotate my baking sheets halfway through the baking time.
Nutritional Information and Dietary Considerations
| Nutrient | Per Cookie (1 large) | Daily Value % |
|---|---|---|
| Calories | 285 | 14% |
| Total Fat | 12g | 15% |
| Saturated Fat | 7g | 35% |
| Cholesterol | 35mg | 12% |
| Sodium | 180mg | 8% |
| Total Carbs | 42g | 15% |
| Dietary Fiber | 2g | 7% |
| Total Sugars | 28g | – |
| Protein | 4g | 8% |
These cookies are undeniably indulgent treats that should be enjoyed in moderation. However, I’ve successfully created variations to accommodate different dietary needs. For gluten-free versions, I substitute the all-purpose flour with a high-quality gluten-free flour blend, though the texture is slightly different.
Dairy-free adaptations work well using vegan butter substitutes, though I recommend choosing one with similar fat content to regular butter. The cookies may spread slightly more, so extra chilling time helps compensate.
For those watching sugar intake, I’ve experimented with reducing the sugar by up to 25% without significantly affecting the texture, though the cookies will be less sweet and may not achieve the same vibrant color.
Creative Variations and Flavor Combinations
The basic Big Blue Monster cookie serves as an excellent canvas for creative variations. I’ve developed several popular alternatives that my family and friends request regularly.
The “Purple Monster” version uses grape-flavored mix-ins and purple food coloring, creating a fun twist that’s particularly popular with younger children. I substitute some of the chocolate chips with white chocolate chips and add freeze-dried grape pieces for intense flavor bursts.
My “Green Monster” variation incorporates mint extract and green coloring, with crushed mint cookies and dark chocolate chips. This version has become a favorite during the holiday season, especially when I add a few drops of peppermint extract to the dough.
For adults, I created a “Sophisticated Monster” using dark blue coloring, espresso powder, and a combination of dark chocolate chunks and chopped hazelnuts. The coffee flavor adds complexity while the hazelnuts provide an elegant crunch.
Storage and Serving Suggestions
Proper storage ensures these cookies maintain their texture and flavor for several days. I store completely cooled cookies in airtight containers at room temperature, where they stay fresh for up to one week. The key is ensuring they’re completely cool before storing, as any residual warmth creates condensation that makes cookies soggy.
For longer storage, these cookies freeze exceptionally well. I wrap individual cookies in plastic wrap and store them in freezer bags for up to three months. When ready to serve, I let them thaw at room temperature for about 30 minutes.
The dough also freezes beautifully, which I find incredibly convenient for busy schedules. I shape the cookies and freeze them on baking sheets until solid, then transfer them to freezer bags. They can be baked directly from frozen, though they need an extra 2-3 minutes in the oven.
For serving, I like presenting these cookies on large platters or cake stands where their impressive size can be properly appreciated. They pair wonderfully with cold milk, hot chocolate, or vanilla ice cream. During parties, I sometimes serve them slightly warm, which makes the chocolate chips delightfully gooey.
Ingredient Substitution Guide
| Original Ingredient | Substitution | Notes |
|---|---|---|
| All-purpose flour | Gluten-free flour blend | Use 1:1 ratio, may need extra binding |
| Butter | Vegan butter | Choose high-fat content variety |
| Large eggs | Flax eggs (2 tbsp ground flax + 6 tbsp water) | Mix and let sit 5 minutes before using |
| Brown sugar | Coconut sugar | Slightly less sweet, may affect texture |
| Vanilla extract | Almond extract | Use half the amount, stronger flavor |
| Semi-sweet chips | Dark chocolate chunks | Chop into small pieces for even distribution |
| Vanilla wafers | Graham crackers | Crush to similar size pieces |
Professional Tips for Bakery-Quality Results
After years of perfecting this recipe, I’ve developed several professional techniques that elevate these cookies from good to extraordinary. Temperature monitoring throughout the process is crucial – I use an instant-read thermometer to ensure my butter is exactly 65-68°F when creaming, which provides optimal texture.
The mixing process requires patience and attention to timing. When creaming butter and sugar, I set a timer for exactly 5 minutes and don’t stop early, even if the mixture looks ready. This extended creaming time incorporates maximum air, resulting in lighter, more tender cookies.
For the most even color distribution, I add the food coloring to the butter-sugar mixture rather than with the eggs. This ensures the color is fully incorporated before adding other ingredients that might interfere with proper mixing.
I always use parchment paper rather than greasing the pans because it provides more even heat distribution and prevents the cookie bottoms from browning too quickly. The parchment also makes removing the cookies much easier, reducing the risk of breaking these delicate giants.
Special Equipment and Tools
| Tool | Purpose | Alternative |
|---|---|---|
| Stand mixer | Creaming butter and sugar efficiently | Hand mixer (requires longer mixing time) |
| Large cookie scoop (3-4 oz) | Uniform cookie sizing | Ice cream scoop or measuring cup |
| Kitchen scale | Accurate ingredient measurement | Measuring cups (less precise) |
| Gel food coloring | Vibrant color without affecting consistency | Liquid coloring (adjust flour accordingly) |
| Heavy-duty baking sheets | Even heat distribution | Regular sheets (may need temperature adjustment) |
| Wire cooling racks | Proper air circulation during cooling | Paper towels (less effective) |
Seasonal Adaptations and Holiday Themes
These versatile cookies adapt beautifully to seasonal celebrations and holidays. During Halloween, I create “Orange Monster” cookies using orange food coloring and incorporating candy corn pieces and mini marshmallows. The result is a festive treat that captures the spirit of the season while maintaining the beloved stuffed cookie concept.
Christmas brings opportunities for “Festive Monster” variations using red and green coloring to create marbled effects. I substitute some chocolate chips with crushed peppermint candies and dried cranberries, creating cookies that taste like the holidays while maintaining their playful monster character.
Valentine’s Day calls for “Pink Monster” cookies with strawberry-flavored mix-ins and pink coloring. I sometimes add freeze-dried strawberries and white chocolate chips, creating a romantic twist on the monster theme that’s surprisingly elegant.
Spring celebrations inspire “Pastel Monster” cookies in soft yellows, pinks, and greens. I use lighter coloring and incorporate lemon or lime zest with corresponding colored chips, creating fresh, bright flavors that celebrate the season’s renewal.
Frequently Asked Questions
Q. Why do my cookies spread too much during baking? The most common cause is butter that’s too warm or dough that hasn’t been chilled sufficiently. Make sure your butter is at proper room temperature (around 65-68°F) when mixing, and always chill the shaped cookies for at least 30 minutes before baking. Also, check that your oven temperature is accurate with an oven thermometer.
Q. How can I achieve the perfect Cookie Monster blue color? Use gel food coloring rather than liquid, starting with about 1 teaspoon and adding more gradually until you reach the desired shade. Sometimes adding just a tiny drop of green gel coloring helps achieve that perfect Cookie Monster blue. Remember that the color may appear slightly different after baking.
Q. Can I make these cookies smaller for portion control? Absolutely! You can make regular-sized cookies using about 2 tablespoons of dough each. Reduce the baking time to 8-10 minutes and watch carefully for doneness. The stuffing ratio remains the same, but the cookies won’t have quite the same dramatic “monster” impact.
Q. What’s the best way to prevent the stuffing from sinking to the bottom? Ensure your dough is properly chilled and not too soft. Also, make sure your stuffing pieces aren’t too large or heavy. Coating chocolate chips and cookie pieces in a light dusting of flour before folding them in can help them stay suspended in the dough.
Q. How do I know when the cookies are done baking? Look for edges that are set and lightly golden, while the centers still appear slightly underbaked. The cookies will continue cooking on the hot pan after removal from the oven. If you bake them until the centers look completely done, they’ll be overbaked once cooled.
Q. Can I use natural food coloring instead of artificial? Natural blue food coloring is available, though it typically produces a less vibrant color and may require larger quantities. Spirulina powder can provide a blue-green tint, but the flavor may be noticeable. For the most authentic Cookie Monster appearance, gel food coloring works best.
Q. Why do my cookies sometimes crack on top? Surface cracking usually indicates the oven temperature is too high or the cookies are overbaking. Try reducing the temperature by 25°F and checking for doneness earlier. Also, ensure you’re not overmixing the dough after adding flour, which can create tough cookies prone to cracking.
Q. How can I make these cookies more nutritious? You can substitute up to half the all-purpose flour with whole wheat pastry flour for added fiber. Adding chopped nuts increases protein and healthy fats. Using dark chocolate chips provides antioxidants. However, remember these are treat cookies, so moderation is key regardless of modifications.
These Big Blue Monster Stuffed Cookies represent more than just a dessert – they’re an experience that brings joy to both the baker and those lucky enough to enjoy them. The combination of vibrant color, surprising textures, and nostalgic Cookie Monster appeal makes them perfect for celebrations, gifts, or simply brightening an ordinary day. Through careful attention to technique and quality ingredients, you’ll create cookies that not only look spectacular but deliver an unforgettable taste experience that will have everyone asking for the recipe.
The beauty of this recipe lies in its adaptability and the endless possibilities for customization. Whether you stick to the classic blue version or venture into creative variations, these cookies never fail to impress. Take your time with each step, don’t be afraid to experiment with different stuffing combinations, and most importantly, have fun with the process. After all, the best cookies are made with a generous helping of joy alongside all those delicious ingredients.

