I’ve been making Indian butter chicken for years, and I can honestly say this is the recipe that changed my entire relationship with Indian cooking. When I first attempted butter chicken, I was intimidated by the long ingredient lists and complex techniques I found in traditional cookbooks. But through countless kitchen experiments and a few spectacular failures, I’ve developed a foolproof method that delivers authentic, restaurant-quality butter chicken right in your own kitchen.
This creamy, aromatic dish known as Murgh Makhani has become my go-to recipe for impressing dinner guests and satisfying my family’s craving for comfort food with an exotic twist. The secret lies in understanding how to balance the rich tomato-based sauce with perfectly spiced, tender chicken that melts in your mouth.
What Makes This Butter Chicken Special
My approach to butter chicken focuses on building layers of flavor without requiring a culinary degree to execute. I’ve streamlined the traditional process while maintaining the authentic taste that makes this dish so beloved worldwide. The key difference in my recipe is the careful balance of spices and the technique I use for creating that signature velvety sauce.
Unlike many simplified versions that sacrifice flavor for convenience, I’ve found ways to achieve maximum taste impact with strategic shortcuts. The marinade time can be reduced without compromising the chicken’s tenderness, and my sauce method creates that restaurant-quality richness without spending hours at the stove.
Essential Ingredients Breakdown
Understanding your ingredients is crucial for butter chicken success. Let me walk you through each component and why it matters for the final dish.
Chicken Selection: I always use boneless, skinless chicken thighs when possible. While chicken breast works, thighs remain juicier and more flavorful during the cooking process. The slightly higher fat content in thighs also helps them absorb the marinade more effectively.
Spice Foundation: The spice blend is where butter chicken gets its character. Garam masala serves as the backbone, but the combination of cumin, coriander, paprika, and turmeric creates the complex flavor profile. I’ve learned that toasting whole spices and grinding them fresh makes a noticeable difference, though pre-ground spices work perfectly fine for everyday cooking.
Tomato Base: The sauce’s foundation relies on quality tomatoes. I prefer using canned whole tomatoes that I crush myself rather than pre-crushed varieties. The texture and acidity levels are more consistent, and you have better control over the final sauce consistency.
Dairy Components: Heavy cream and butter are non-negotiable for authentic butter chicken. Some recipes suggest lighter alternatives, but the richness these ingredients provide is essential for the dish’s character. Greek yogurt in the marinade adds tanginess and helps tenderize the chicken.
| Ingredient Category | Primary Ingredients | Purpose | Substitution Notes |
|---|---|---|---|
| Protein | Chicken thighs, yogurt | Main component, tenderizing | Chicken breast works but may be drier |
| Spice Base | Garam masala, cumin, coriander, turmeric | Flavor foundation | Pre-mixed curry powder in emergency |
| Aromatics | Ginger, garlic, onions | Flavor base building | Fresh preferred, paste acceptable |
| Tomato Base | Whole canned tomatoes, tomato paste | Sauce foundation | Fresh tomatoes work but less consistent |
| Richness | Heavy cream, butter | Signature creaminess | Half-and-half reduces richness significantly |
| Heat | Cayenne pepper, paprika | Warmth and color | Adjust to taste preference |
The Perfect Marinade Technique
Marinating is where many home cooks either overcomplicate or oversimplify the process. I’ve found that a 30-minute marinade delivers 80% of the flavor benefit of overnight marinating, making this dish accessible for weeknight dinners.
My marinade combines yogurt’s tenderizing enzymes with spices that penetrate the meat. The key is creating a paste-like consistency that clings to the chicken rather than running off. I start with Greek yogurt because its thickness provides better coverage and doesn’t make the chicken soggy.
The spice ratio in my marinade emphasizes garam masala and ginger-garlic paste. These flavors complement rather than compete with the final sauce. I add a pinch of salt to help draw moisture from the chicken, allowing the spices to penetrate more effectively.
Temperature matters during marinating. Room temperature chicken absorbs flavors faster than cold chicken straight from the refrigerator. I remove the chicken 15 minutes before marinating to take the chill off, which significantly improves spice absorption.
Building the Sauce Foundation
The sauce is where butter chicken transforms from good to extraordinary. My technique focuses on creating layers of flavor through proper ingredient sequencing and cooking methods.
I start by cooking the onions until they’re golden and slightly caramelized. This step cannot be rushed because the natural sugars in the onions provide the subtle sweetness that balances the spices. Authentic butter chicken recipes use proper cooking of onions to add sweetness rather than added sugar.
The ginger-garlic paste goes in next, followed immediately by the spice blend. This order prevents the garlic from burning while allowing the spices to bloom in the oil. The aromatic release at this stage tells you everything is progressing correctly.
Tomatoes come next, and here’s where my technique differs from many recipes. I add the tomatoes in stages, allowing some to cook down completely before adding more. This creates a concentrated tomato base with complex flavors rather than a thin, acidic sauce.
Cooking Method Breakdown
My cooking method emphasizes achieving restaurant-quality results with home kitchen equipment. The process involves three main phases: marinating and searing the chicken, building the sauce base, and combining everything for the final simmer.
Phase One: Chicken Preparation I sear the marinated chicken in batches to avoid overcrowding the pan. This step isn’t about fully cooking the chicken but rather developing color and flavor. The slight char you get from proper searing mimics the tandoor effect that traditional butter chicken requires.
Phase Two: Sauce Development While the chicken rests, I build the sauce in the same pan, utilizing the fond (browned bits) left from searing. This technique adds another layer of flavor that many home recipes miss. The sauce needs to simmer until it reduces slightly and the oil begins to separate around the edges.
Phase Three: Final Assembly The chicken returns to the sauce for the final cooking phase. This is where the magic happens as the flavors meld together. The key is maintaining a gentle simmer that allows the chicken to finish cooking without becoming tough.
| Cooking Phase | Time Required | Key Indicators | Common Mistakes |
|---|---|---|---|
| Chicken Searing | 6-8 minutes | Golden color, slight char | Overcrowding pan, too low heat |
| Sauce Base | 15-20 minutes | Oil separation, thick consistency | Rushing onion stage, high heat |
| Final Simmer | 10-12 minutes | Chicken cooked through, sauce glossy | Boiling vs simmering, not stirring |
| Cream Addition | 2-3 minutes | Smooth integration, no curdling | Adding cold cream, too high heat |
Spice Blend Mastery
Creating the perfect spice blend is crucial for authentic butter chicken flavor. I’ve experimented with countless combinations and ratios to develop a blend that works consistently.
My base blend starts with garam masala as the foundation, but I enhance it with additional spices for complexity. The ratio I use is approximately 40% garam masala, 20% ground coriander, 15% cumin, 15% paprika, and 10% turmeric. This combination provides warmth without overwhelming heat.
Spice Quality Considerations: Fresh, high-quality spices make a remarkable difference in the final dish. I replace my spice collection every six months and store them in airtight containers away from light and heat. When possible, I toast whole spices and grind them fresh, but this isn’t essential for excellent results.
Heat Level Management: Butter chicken should have warmth rather than aggressive heat. I control the spice level through cayenne pepper additions, starting conservatively and adjusting upward. Remember, you can always add heat, but you can’t remove it once it’s in the dish.
Achieving the Perfect Cream Integration
The cream addition is where many home cooks encounter problems. Curdling occurs when cream hits a sauce that’s too hot or too acidic. My technique prevents this issue while creating that signature silky texture.
I always temper the cream before adding it to the sauce. This means gradually warming the cream with a small amount of the hot sauce before incorporating the mixture back into the main pot. This technique, borrowed from French cooking, prevents temperature shock that causes curdling.
Timing is crucial for cream addition. The sauce should be at a gentle simmer, not a rolling boil, when the cream goes in. I remove the pot from direct heat, add the tempered cream while stirring constantly, and then return to low heat for the final few minutes of cooking.
The final texture should coat the back of a spoon without being thick enough to stand a spoon upright. If the sauce becomes too thick, I thin it with a small amount of chicken broth rather than more cream, which can make the dish too rich.
Complete Recipe Instructions
Ingredients
For the Chicken Marinade:
- 2 lbs boneless chicken (thighs preferred, cut into bite-sized pieces)
- 1 cup Greek yogurt
- 2 tablespoons ginger-garlic paste
- 1 teaspoon garam masala
- 1/2 teaspoon turmeric
- 1/2 teaspoon cumin
- 1 teaspoon salt
- 1 tablespoon vegetable oil
For the Sauce:
- 3 tablespoons butter
- 1 large onion, finely chopped
- 2 tablespoons ginger-garlic paste
- 2 teaspoons garam masala
- 1 teaspoon ground coriander
- 1 teaspoon cumin
- 1 teaspoon paprika
- 1/2 teaspoon turmeric
- 1/4 teaspoon cayenne pepper (adjust to taste)
- 1 can (28 oz) whole tomatoes, crushed by hand
- 2 tablespoons tomato paste
- 1 cup heavy cream
- 2 tablespoons butter (for finishing)
- 1 teaspoon sugar (optional)
- Salt to taste
- Fresh cilantro for garnish
- 1/4 cup cashews (optional, for extra richness)
Detailed Cooking Instructions
Step 1: Prepare the Marinade Combine all marinade ingredients in a large bowl. Mix thoroughly until the chicken is evenly coated. Let marinate for at least 30 minutes at room temperature, or up to 4 hours in the refrigerator for deeper flavor.
Step 2: Cook the Chicken Heat 2 tablespoons oil in a large, heavy-bottomed pan over medium-high heat. Remove chicken from marinade and sear in batches, cooking for 3-4 minutes per side until golden. Don’t worry about cooking through completely. Transfer to a plate and set aside.
Step 3: Build the Sauce Base In the same pan, melt 3 tablespoons butter over medium heat. Add chopped onions and cook for 8-10 minutes until golden and soft. Add ginger-garlic paste and cook for 1 minute until fragrant.
Step 4: Add Spices Add all the spices (garam masala through cayenne) and cook for 30 seconds until fragrant. Be careful not to burn the spices.
Step 5: Add Tomatoes Add crushed tomatoes and tomato paste. Cook for 15-20 minutes, stirring occasionally, until the sauce thickens and oil begins to separate around the edges. The sauce should be a deep red color.
Step 6: Create Silky Texture (Optional) For an ultra-smooth sauce, let the mixture cool slightly and blend until smooth. If using cashews, add them before blending. Return to the pan.
Step 7: Add Cream Reduce heat to low. In a small bowl, temper the cream by mixing it with 2-3 tablespoons of the hot sauce. Gradually stir this mixture back into the main sauce.
Step 8: Final Assembly Return the chicken to the pan and simmer gently for 10-12 minutes until the chicken is cooked through and the flavors have melded. Stir in the final 2 tablespoons of butter for extra richness.
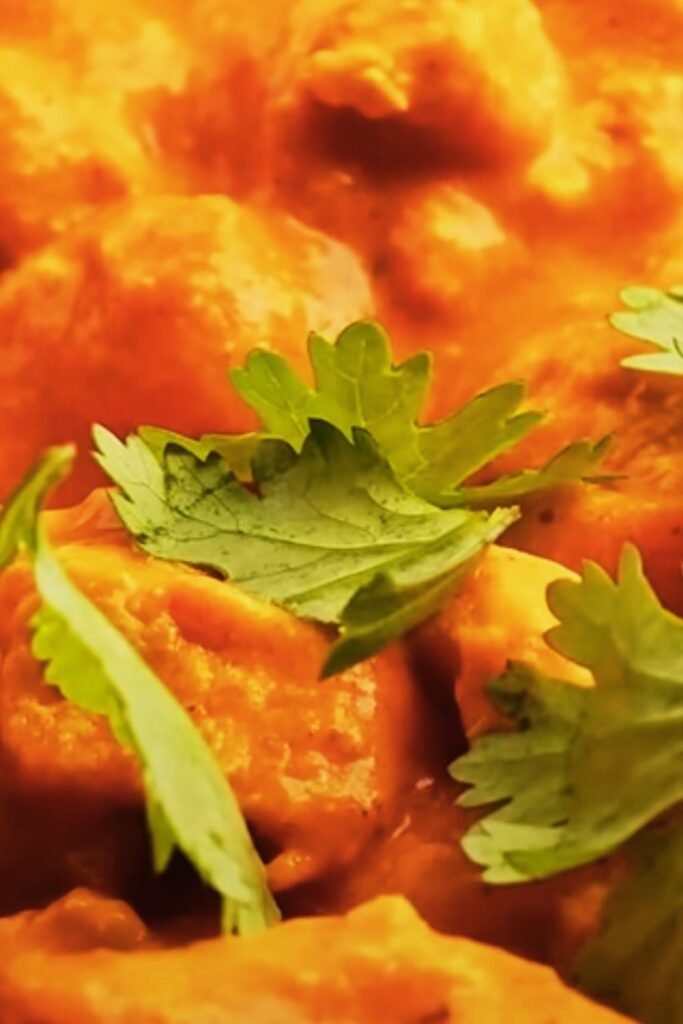
Step 9: Final Seasoning Taste and adjust seasoning with salt, sugar (if needed for balance), or additional spices. The sauce should be creamy, aromatic, and well-balanced.
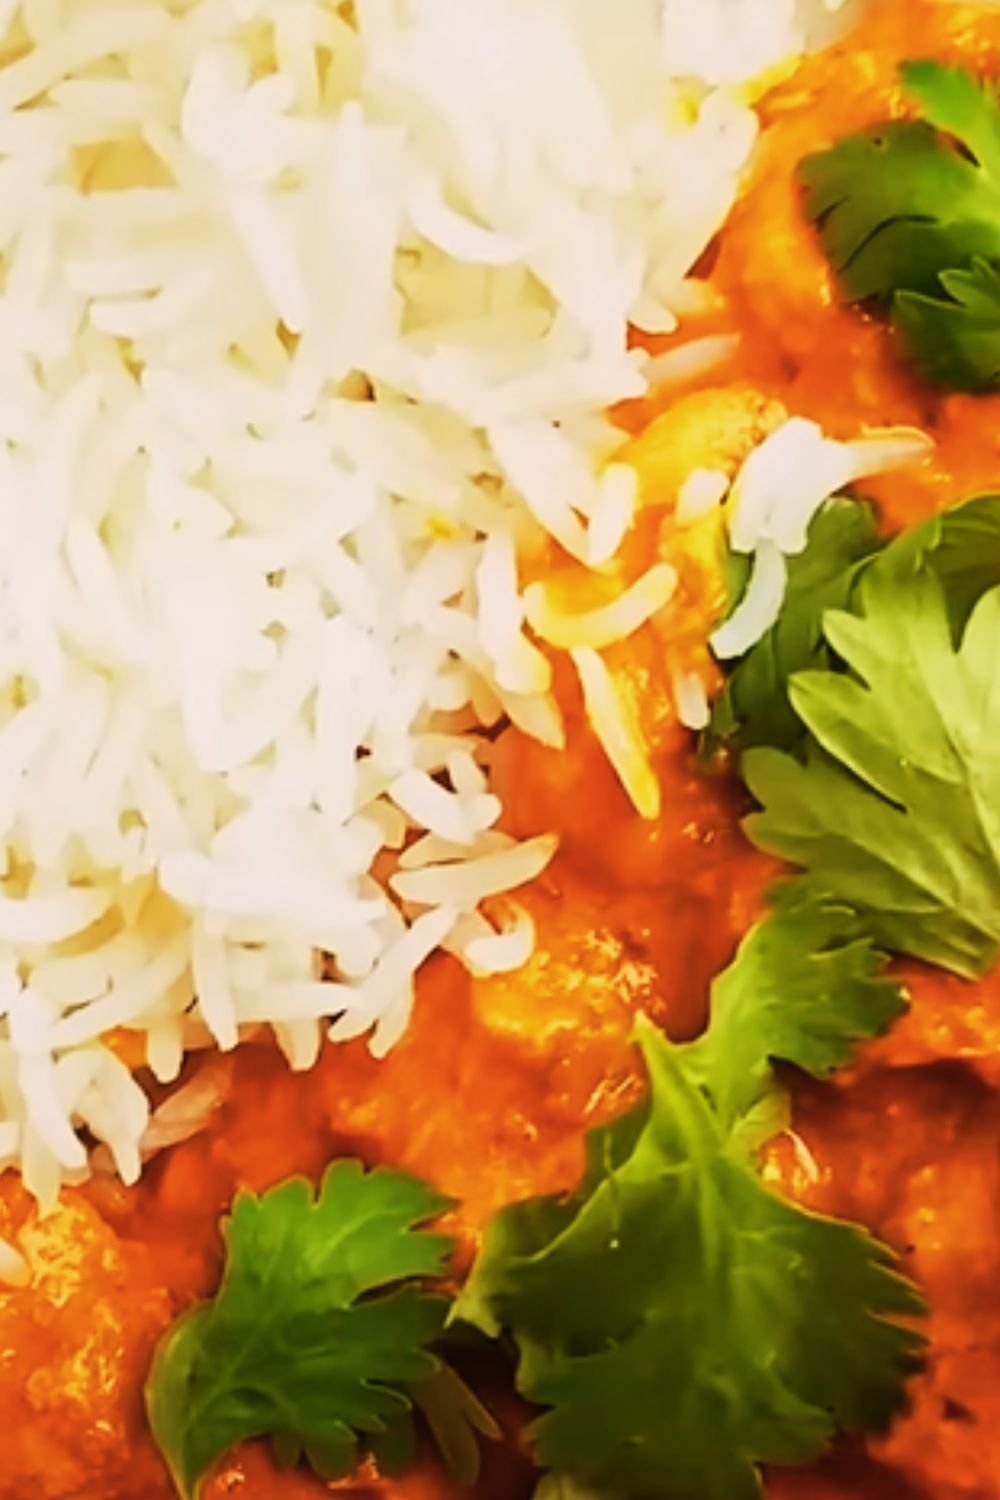
Step 10: Garnish and Serve Garnish with fresh cilantro and serve immediately with basmati rice, naan, or your preferred accompaniment.
Nutritional Information and Serving Details
Understanding the nutritional profile of butter chicken helps you make informed decisions about portion sizes and accompaniments. While this is undeniably a rich dish, it provides substantial protein and can be part of a balanced meal when served appropriately.
| Nutritional Component | Per Serving (serves 6) | Daily Value % | Notes |
|---|---|---|---|
| Calories | 485 | 24% | Based on 2000 calorie diet |
| Total Fat | 32g | 41% | Primarily from cream and butter |
| Saturated Fat | 18g | 90% | High due to dairy content |
| Cholesterol | 145mg | 48% | From chicken and dairy |
| Sodium | 890mg | 39% | Can be reduced with less salt |
| Total Carbohydrates | 12g | 4% | Mainly from onions and tomatoes |
| Dietary Fiber | 3g | 11% | From vegetables and spices |
| Protein | 38g | 76% | Excellent protein source |
| Vitamin A | 25% | From tomatoes and spices | |
| Vitamin C | 20% | From tomatoes and onions | |
| Calcium | 15% | From dairy products | |
| Iron | 18% | From chicken and spices |
Serving Suggestions and Accompaniments
The beauty of butter chicken lies in its versatility with various accompaniments. I’ve experimented with numerous combinations over the years and found certain pairings that elevate the entire meal experience.
Traditional Rice Pairings: Basmati rice remains the classic choice for good reason. Its light, fluffy texture and subtle fragrance complement without competing with the rich sauce. I prepare my basmati by rinsing until the water runs clear, then cooking with a bay leaf and cardamom pod for extra aromatic depth.
Bread Options: Naan bread is the restaurant standard, but I often make my own flatbreads at home. Roti or chapati work beautifully and are easier to prepare than naan. For a fusion approach, I’ve served butter chicken with warm pita bread or even good-quality dinner rolls.
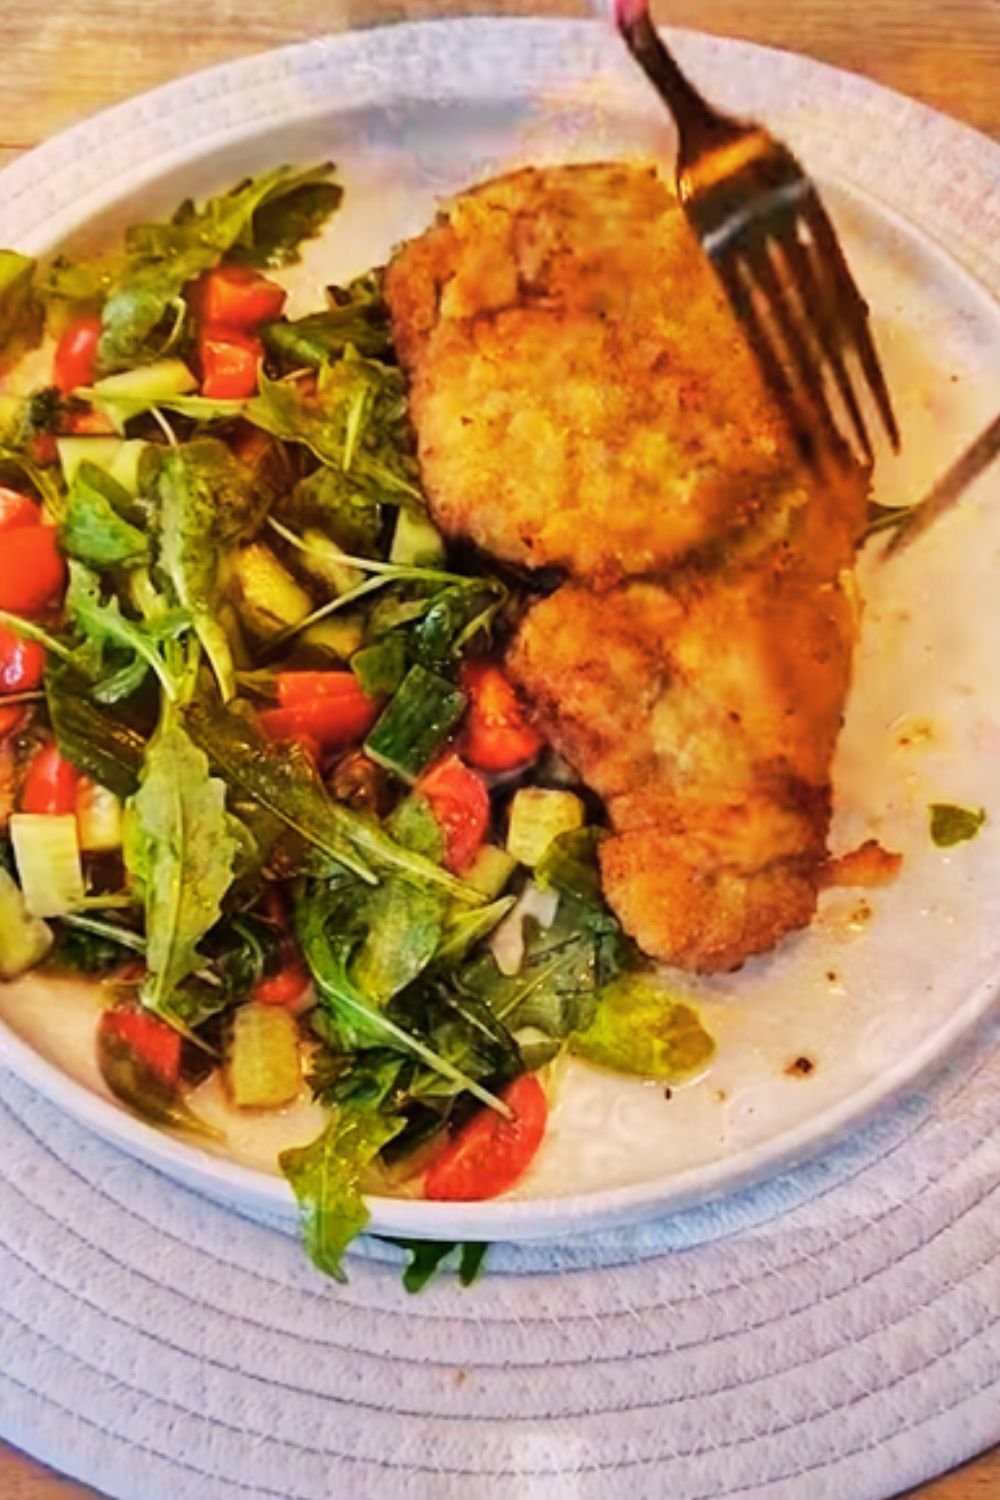
Fresh Elements: The richness of butter chicken benefits from fresh, cooling accompaniments. I always serve it with sliced cucumber, red onion, and tomato dressed with lemon juice and a pinch of salt. This simple salad provides textural contrast and helps cleanse the palate between bites.
Vegetable Sides: Roasted cauliflower with cumin, steamed broccoli, or sautéed spinach add nutritional balance and color to the plate. These vegetables pair well with the spiced sauce and provide fiber to balance the rich main dish.
Common Mistakes and Troubleshooting
Through years of making butter chicken and teaching others, I’ve identified the most common issues home cooks encounter and developed reliable solutions for each problem.
Curdled Sauce Issues: This happens when cream is added to sauce that’s too hot or too acidic. Prevention involves tempering the cream and keeping the heat low during addition. If curdling occurs, remove from heat immediately and whisk vigorously. Sometimes adding a tablespoon of cold butter while whisking can help restore smoothness.
Bland Flavor Profile: Usually results from insufficient spice blooming or using old spices. The solution involves properly cooking the spice paste until aromatic and using fresh, quality spices. I taste the sauce before adding cream and adjust seasonings at this stage when flavors are more concentrated.
Tough Chicken Texture: Overcooking is the primary culprit, especially when using chicken breast. The solution is monitoring cooking time carefully and using a meat thermometer. Chicken should reach 165°F internal temperature but no higher.
Sauce Consistency Problems: Too thin sauce usually results from insufficient cooking time or too much added liquid. Simmer uncovered to reduce, or mix a small amount of tomato paste with water to thicken. Too thick sauce can be adjusted with small amounts of chicken broth or water.
Storage and Reheating Guidelines
Proper storage techniques ensure your butter chicken maintains quality and safety for future meals. I’ve developed methods that preserve both flavor and texture during storage and reheating.
Refrigerator Storage: Cool completely before refrigerating. Store in airtight containers for up to 4 days. The sauce may thicken during refrigeration, which is normal. Avoid storing for longer periods as dairy-based sauces can develop off-flavors.
Freezer Storage: Butter chicken freezes well for up to 3 months. I recommend slightly undercooking if you plan to freeze, as reheating will continue the cooking process. Use freezer-safe containers and leave some headspace for expansion.
Reheating Techniques: Gentle reheating preserves the sauce texture. I prefer stovetop reheating over microwave when possible. Add a splash of cream or broth if the sauce appears too thick. Heat slowly, stirring frequently, until heated through.
The sauce may appear slightly separated after refrigeration or freezing, but gentle stirring during reheating usually restores the smooth consistency. If separation persists, a brief blend with an immersion blender can restore the original texture.
Variations and Adaptations
Over the years, I’ve developed several variations of my basic butter chicken recipe to accommodate different dietary needs and flavor preferences. These adaptations maintain the essential character of the dish while offering flexibility.
Dairy-Free Version: Coconut cream makes an excellent substitute for heavy cream, providing richness with a subtle coconut flavor that complements the spices. Use coconut oil instead of butter for cooking, and coconut yogurt for marinating. The result is surprisingly authentic-tasting.
Lighter Version: Greek yogurt can replace some of the heavy cream for a lighter dish. I use half cream and half Greek yogurt, stirring the yogurt in off the heat to prevent curdling. This reduces calories while maintaining creaminess.
Vegetarian Adaptations: Paneer, cauliflower, or chickpeas work beautifully in place of chicken. Paneer requires minimal cooking time, while vegetables need longer to become tender. Chickpeas should be pre-cooked and added during the final simmering stage.
Spice Level Variations: For milder versions, reduce or eliminate cayenne pepper and use sweet paprika instead of hot. For spicier versions, add fresh chopped chilies along with the ginger-garlic paste, or include a pinch of ghost pepper powder for serious heat.
Questions and Answers
Q. How long should I marinate the chicken for the best flavor?
While I mentioned 30 minutes delivers great results, marinating for 2-4 hours produces noticeably deeper flavor penetration. Overnight marinating is ideal when planning ahead, but beyond 24 hours, the yogurt’s enzymes can make the chicken mushy. For quick weeknight dinners, even 15 minutes of marinating while you prep other ingredients makes a difference.
Q. Can I make butter chicken without a blender for the sauce?
Absolutely! While blending creates restaurant-style smoothness, many traditional preparations don’t use blenders. Cook the onions and tomatoes longer until they break down naturally, and crush them with the back of a spoon. The sauce will have more texture but equally delicious flavor. Some people actually prefer this rustic style.
Q. What’s the best way to adjust the spice level after the dish is finished?
For reducing heat, add more cream or a dollop of yogurt stirred in off the heat. A pinch of sugar can also help balance excessive spice. For increasing heat, make a small paste of cayenne pepper with a bit of the sauce and stir it in gradually, tasting as you go. Remember that spice levels intensify as the dish sits, so make conservative adjustments.
Q. Why does my butter chicken taste different from restaurant versions?
Restaurant versions often use a tandoor oven, which imparts smoky flavors that are hard to replicate at home. Try finishing your chicken under the broiler for a few minutes to develop char. Restaurants also typically use more butter and cream than home recipes suggest. Additionally, they often add a small amount of red food coloring for that distinctive bright orange color.
Q. Can I prep butter chicken ingredients in advance?
Yes! The chicken can be marinated up to 24 hours ahead. The sauce base (through the tomato cooking stage) can be made 2 days in advance and refrigerated. When ready to serve, reheat the sauce, add the cream, then the pre-marinated chicken. This actually improves flavors as they have more time to develop.
Q. What should I do if my sauce separates or looks grainy?
Sauce separation usually occurs from overheating or adding cold cream to hot sauce. Remove from heat immediately and whisk vigorously. Adding a pat of cold butter while whisking often helps re-emulsify the sauce. If the problem persists, blend the sauce briefly with an immersion blender. Prevention is easier than correction, so always temper your cream.
Q. Is it normal for the oil to separate from the sauce during cooking?
Yes, this is actually a good sign! When you see oil beginning to separate around the edges of your tomato sauce, it indicates the sauce has cooked sufficiently and the flavors have concentrated properly. This is the traditional indicator that your sauce base is ready for the cream addition.
Q. Can I substitute Greek yogurt for heavy cream in the sauce?
While possible, the results differ significantly from traditional butter chicken. If using Greek yogurt as a cream substitute, add it off the heat and whisk constantly to prevent curdling. The final dish will be tangier and less rich. I recommend using yogurt to replace only half the cream for best results.
This comprehensive guide represents years of experimentation and refinement in my own kitchen. I hope it helps you create butter chicken that brings the authentic flavors of Indian cuisine to your family table with confidence and success.