Have you ever found yourself standing in line at Starbucks, eyeing that perfect slice of banana bread behind the glass case? I know I have! That moist, walnut-studded treat with its perfectly caramelized top has been my guilty pleasure for years. But at nearly $4 a slice, my wallet wasn’t loving my banana bread habit.
After countless attempts and many (delicious) failures, I’ve finally cracked the code on Starbucks’ famous banana bread. The best part? My homemade version actually tastes better than the original, costs a fraction of the price, and fills your home with an irresistible aroma that no scented candle could ever replicate.
Today, I’m sharing my perfected copycat Starbucks banana bread recipe that my family and friends literally beg me to make. This isn’t just any banana bread—it’s a slice of coffee shop luxury you can enjoy in your pajamas!
Why This Recipe Works Better Than Starbucks
Before diving into the recipe, let me tell you why this homemade version outshines the original:
- Superior Ingredient Quality: Using real butter instead of oil creates a richer flavor profile
- Customizable Sweetness: Control the sugar level to your preference
- Perfect Texture: Achieve that perfect balance between moist center and caramelized exterior
- Budget-Friendly: Make an entire loaf for less than the cost of two Starbucks slices
- No Preservatives: Just wholesome ingredients you can pronounce
- Freshness Factor: Nothing beats warm banana bread straight from your oven
The Secret to Perfect Banana Ripeness
The most crucial ingredient in banana bread isn’t listed in the recipe—it’s patience! The bananas you use make or break your bread. Here’s my foolproof guide to banana ripeness:
- Yellow with small brown spots: Not ready yet! These bananas haven’t developed enough natural sugars.
- Heavily speckled with significant brown areas: Getting closer! These will work in a pinch.
- Nearly black exterior: Perfect! These ugly, overripe bananas are banana bread gold.
- Black and slightly soft to touch: Absolutely ideal! The natural sugars have fully developed.
I keep a “banana bread bowl” on my counter where aging bananas go to ripen. If you need to speed up the process, place them in a paper bag with an apple—the ethylene gas will accelerate ripening.
Ingredients You’ll Need
For one perfect 9×5-inch loaf that rivals Starbucks:
| Ingredient | Amount | Notes |
|---|---|---|
| Overripe bananas | 3 large (about 1½ cups mashed) | The blacker the better! |
| All-purpose flour | 2 cups | Measured correctly (fluff, spoon, level) |
| Granulated sugar | ¾ cup | Can reduce to ⅔ cup if your bananas are very ripe |
| Brown sugar | ¼ cup, packed | Adds moisture and caramel notes |
| Unsalted butter | ½ cup (1 stick) | Melted and slightly cooled |
| Eggs | 2 large | Room temperature works best |
| Sour cream | ¼ cup | Secret ingredient for moisture! |
| Vanilla extract | 1½ teaspoons | Pure, not imitation |
| Baking soda | 1 teaspoon | Ensures proper rise |
| Salt | ½ teaspoon | Balances sweetness |
| Ground cinnamon | 1 teaspoon | For that signature Starbucks flavor |
| Walnuts | ¾ cup | Roughly chopped (plus extra for topping) |
Equipment Needed
- 9×5-inch loaf pan
- Parchment paper
- Large mixing bowl
- Medium mixing bowl
- Whisk
- Rubber spatula
- Fork or potato masher (for bananas)
- Cooling rack
Step-by-Step Instructions
Preparation Steps
- Preheat your oven to 350°F (175°C).
- Line your loaf pan with parchment paper, leaving some overhang on the sides for easy removal. (This is crucial for perfect results!)
- Lightly grease any exposed parts of the pan with butter or cooking spray.
Making the Batter
- In a medium bowl, mash your bananas with a fork until mostly smooth but with some small chunks remaining. Those little pockets of banana create wonderful flavor bombs in the finished bread!
- In a large bowl, whisk together the flour, baking soda, salt, and cinnamon until well combined.
- In another bowl, whisk together the melted butter, granulated sugar, and brown sugar until smooth and the sugar has mostly dissolved.
- Add the eggs one at a time to the butter mixture, whisking well after each addition.
- Stir in the mashed bananas, sour cream, and vanilla extract until just combined.
- Pour the wet ingredients into the dry ingredients and gently fold together with a rubber spatula. Stop when you still see a few streaks of flour! Overmixing is the enemy of tender banana bread.
- Add ½ cup of the chopped walnuts and fold a few more times just until incorporated and no dry flour remains visible.

Baking Your Masterpiece
- Pour the batter into your prepared loaf pan and smooth the top with your spatula.
- Sprinkle the remaining ¼ cup of walnuts over the top, gently pressing them into the batter so they don’t fall off after baking.
- For that signature Starbucks caramelized top, sprinkle 1 tablespoon of granulated sugar evenly over the surface.
- Bake in the preheated oven for 55-65 minutes. Every oven is different, so start checking at the 50-minute mark by inserting a toothpick into the center. When it comes out with a few moist crumbs (but no wet batter), it’s ready!
- If the top is browning too quickly but the center isn’t done, tent the loaf with aluminum foil.
- Once baked, let the bread cool in the pan for 10 minutes before lifting it out using the parchment paper overhang.
- Transfer to a wire rack and let cool for at least 30 minutes before slicing. (I know it’s tempting to cut in right away, but the texture improves as it cools!)
Troubleshooting Common Banana Bread Problems
Even experienced bakers encounter issues now and then. Here’s how to avoid the most common banana bread pitfalls:
| Problem | Possible Cause | Solution |
|---|---|---|
| Bread is too dense | Overmixing the batter | Mix just until ingredients are combined |
| Center is raw but edges are done | Oven temperature too high | Use an oven thermometer to verify temp |
| Bread sinks in the middle | Opening oven door too early | Wait until at least 40 minutes before checking |
| Dry texture | Not enough banana or fat | Ensure proper measuring of all ingredients |
| Doesn’t rise properly | Old baking soda | Test baking soda freshness before using |
| Sticks to the pan | Inadequate greasing/lining | Always use parchment with overhang |
Storage and Serving Suggestions
This copycat Starbucks banana bread actually improves in flavor the day after baking as the flavors meld together. Here’s how to store and serve it:
Storage Options:
- Counter: Wrap tightly in plastic wrap or store in an airtight container at room temperature for up to 3 days.
- Refrigerator: Extends freshness to 5-7 days. Bring to room temperature before serving for best texture.
- Freezer: Wrap individual slices in plastic wrap, then aluminum foil, and freeze for up to 3 months. Thaw at room temperature for 1-2 hours before enjoying.
Delicious Serving Ideas:
- Warm a slice for 10-15 seconds in the microwave and spread with salted butter (my favorite way!)
- Top with a dollop of Greek yogurt and a drizzle of honey for a more substantial breakfast
- Spread with cream cheese and a sprinkle of cinnamon for a decadent treat
- Pair with fresh berries and a spoonful of nut butter for a balanced snack
- Toast a slice and top with a scoop of vanilla ice cream for an incredible dessert

Variations to Try
While this recipe perfectly replicates the Starbucks version, don’t be afraid to make it your own! Here are some delicious variations:
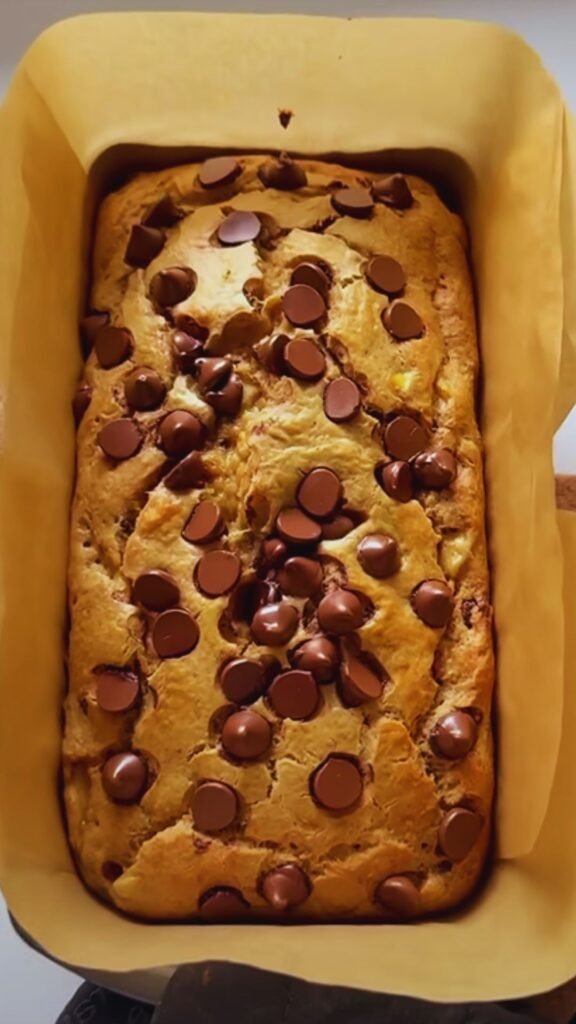
- Chocolate Chip: Add ¾ cup semisweet chocolate chips to the batter
- Nutella Swirl: Warm ¼ cup of Nutella until pourable and swirl through the batter before baking
- Streusel Topping: Mix ¼ cup brown sugar, ¼ cup flour, ¼ cup chopped nuts, and 3 tablespoons cold butter with your fingers until crumbly, then sprinkle on top before baking
- Cream Cheese Filled: Pour half the batter into the pan, add a layer of sweetened cream cheese mixture, then top with remaining batter
- Espresso Infused: Add 1 tablespoon of espresso powder to the dry ingredients for a true coffee shop experience
Cost Breakdown: Starbucks vs. Homemade
Let’s talk frugality! Here’s why making this at home is such a smart financial move:
| Item | Starbucks Cost | Homemade Cost |
|---|---|---|
| One slice of banana bread | $3.95 | $0.68 per slice |
| Entire loaf (8 slices) | $31.60 | $5.44 total |
| Annual savings (1 slice weekly) | – | $170.04 |
These calculations are based on average grocery prices in my area. Your exact savings may vary, but the difference is substantial!
Frequently Asked Questions
Q: Can I make this recipe without nuts due to allergies?
Absolutely! Simply omit the walnuts entirely or substitute with the same amount of chocolate chips, dried cranberries, or sunflower seeds if those aren’t problematic.
Q: My bananas aren’t ripe enough. Can I still make this bread?
While you can use bananas that aren’t super ripe, the flavor won’t be as developed. Try this speed-ripening trick: place unpeeled bananas on a baking sheet and bake at 300°F for 15-20 minutes until blackened. Let cool completely before using.
Q: Can I use gluten-free flour in this recipe?
Yes! A good quality 1:1 gluten-free flour blend works well in this recipe. I recommend adding an extra egg to help with binding and structure.
Q: How can I make this recipe vegan?
Replace the butter with coconut oil, the eggs with flax eggs (1 tablespoon ground flaxseed + 3 tablespoons water per egg), and the sour cream with dairy-free yogurt. The texture will be slightly different but still delicious!
Q: Why did you add sour cream? The original Starbucks version doesn’t have that.
Through testing, I found that sour cream creates that perfect moist texture that makes Starbucks banana bread so special. While they might use a commercial stabilizer, sour cream achieves the same result in home baking.
Q: Can I make this into muffins instead of a loaf?
Definitely! Pour the batter into a lined muffin tin, filling each cup about ¾ full. Bake at the same temperature but reduce the cooking time to 18-22 minutes. This recipe yields about 12 standard-sized muffins.
Q: How ripe is too ripe for bananas?
As long as the bananas don’t smell fermented or have mold, they’re good for bread! The blacker and softer, the sweeter your bread will be. I’ve used bananas that were completely black and ultra-soft with fantastic results.
Why You’ll Never Buy Starbucks Banana Bread Again
After making this copycat version at home, heading to Starbucks for banana bread will seem unnecessary. Not only will you save money, but you’ll also enjoy the satisfaction of creating something truly delicious from scratch. The aroma alone is worth the minimal effort this recipe requires!
Plus, there’s something magical about pulling a perfect loaf from your own oven. It becomes more than just banana bread—it’s an achievement, a treat you crafted with your own hands, and a little moment of joy in your day.
I hope this recipe brings as much happiness to your kitchen as it has to mine. Happy baking!