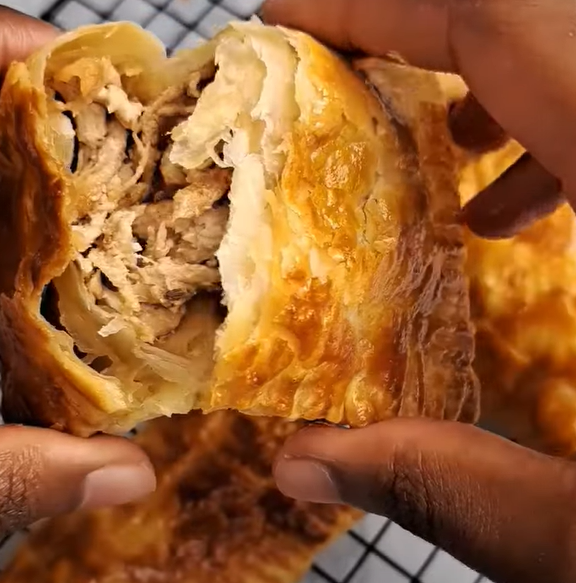
Nothing quite captures the essence of Indian street food like the irresistible crunch of a perfectly made pakora. I’ve been making these delightful vegetable fritters for over fifteen years, and every single bite takes me back to the bustling streets of Delhi during monsoon season. The aroma of gram flour mixing with spices, the sizzle of vegetables hitting hot oil, and that first satisfying crunch – pakoras represent comfort food at its finest.
Today, I’m sharing my foolproof method for creating restaurant-quality pakoras at home. Whether you’re a beginner cook or someone looking to perfect their technique, this comprehensive guide will transform your kitchen into a mini street food paradise.
What Are Pakoras?
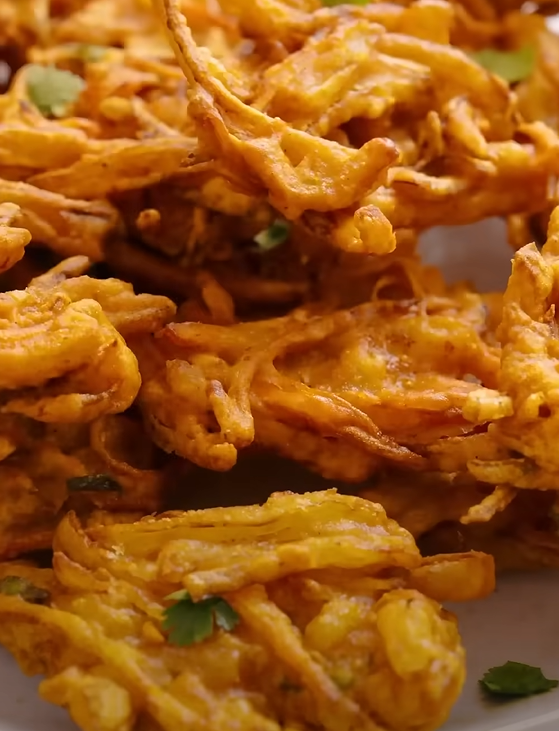
Pakoras are deep-fried Indian snacks made by coating vegetables in a spiced gram flour (besan) batter. The word “pakora” comes from the Sanskrit word “pakvavata,” which literally means “cooked in small pieces.” These golden fritters are beloved across the Indian subcontinent and have countless regional variations.
Gram flour (besan) forms the foundation of any good pakora batter. Made from ground chickpeas, this protein-rich flour creates the characteristic crispy exterior while remaining tender inside.
Monsoon season traditionally marks peak pakora season in India, when families gather to enjoy these hot fritters with steaming cups of chai while watching the rain fall.
Essential Ingredients for Perfect Pakoras
Core Batter Ingredients
| Ingredient | Quantity | Purpose | Substitution Options |
|---|---|---|---|
| Gram flour (besan) | 2 cups | Main batter base | Chickpea flour, garbanzo bean flour |
| Water | 1-1.25 cups | Batter consistency | Sparkling water for extra crispiness |
| Carom seeds (ajwain) | 1 tsp | Digestive aid, flavor | Thyme seeds, oregano |
| Turmeric powder | 1/2 tsp | Color, mild flavor | None recommended |
| Red chili powder | 1 tsp | Heat, color | Cayenne pepper, paprika |
| Garam masala | 1 tsp | Warmth, complexity | Mixed spice powder |
| Salt | 1.5 tsp | Flavor enhancement | Rock salt, sea salt |
| Ginger-garlic paste | 1 tbsp | Aromatic base | Fresh minced ginger and garlic |
Vegetable Options
| Vegetable | Preparation Method | Cooking Time | Flavor Profile |
|---|---|---|---|
| Onions | Thinly sliced rings | 3-4 minutes | Sweet, caramelized |
| Potatoes | 1/4 inch rounds | 4-5 minutes | Creamy, mild |
| Eggplant | 1/4 inch rounds | 3-4 minutes | Rich, meaty |
| Cauliflower | Small florets | 4-5 minutes | Nutty, tender |
| Green chilies | Whole or slit | 2-3 minutes | Spicy, bright |
| Spinach leaves | Whole leaves | 1-2 minutes | Earthy, delicate |
| Bell peppers | Thick strips | 3-4 minutes | Sweet, crunchy |
My Secret to the Perfect Pakora Batter
After years of experimentation, I’ve discovered that the secret lies in achieving the right consistency and letting the batter rest. Here’s my step-by-step method:
Batter Preparation Steps
- Sift the gram flour into a large mixing bowl to eliminate lumps
- Add all dry spices and mix thoroughly with a whisk
- Create a well in the center of the flour mixture
- Gradually add water while whisking continuously to prevent lumps
- Whisk vigorously for 2-3 minutes until completely smooth
- Add ginger-garlic paste and mix well
- Let the batter rest for 15-20 minutes to develop flavor
Consistency Check
The perfect pakora batter should coat a spoon evenly and drop in a steady stream when lifted. I test this by dipping a spoon into the batter – it should coat completely but not be so thick that it forms clumps.
Step-by-Step Pakora Making Process
Preparation Phase
Before I start frying, I always prepare everything in advance. This includes:
- Heating oil to the correct temperature (350°F/175°C)
- Keeping all vegetables ready and patted dry
- Setting up a draining station with paper towels
- Preparing serving plates and chutneys
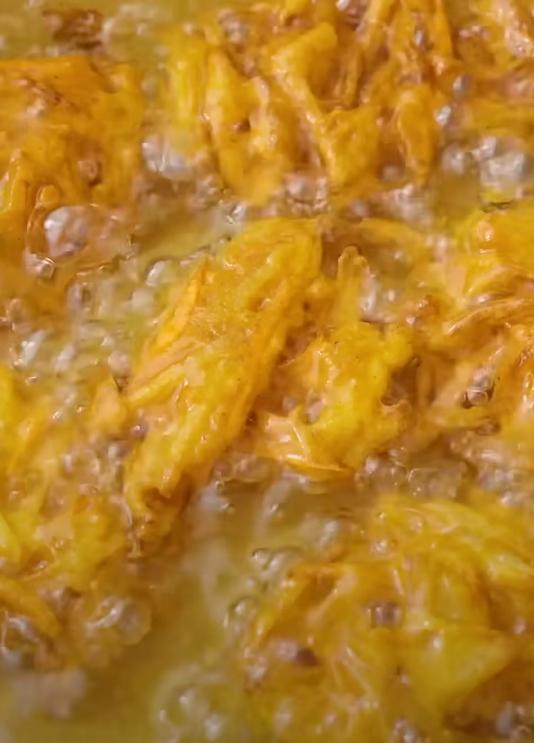
The Frying Technique
- Heat oil properly – I use a heavy-bottomed pan with at least 3 inches of oil depth
- Test temperature by dropping a small amount of batter; it should sizzle immediately
- Coat vegetables thoroughly in batter, ensuring even coverage
- Fry in small batches to maintain oil temperature
- Turn once when the bottom is golden brown
- Drain immediately on paper towels to remove excess oil
Oil Temperature and Timing Chart
| Oil Temperature | Visual Cues | Pakora Results | Timing |
|---|---|---|---|
| Too Low (300°F) | Slow bubbling | Soggy, oil-absorbed | 6-8 minutes |
| Perfect (350°F) | Active bubbling | Crispy, golden | 3-4 minutes |
| Too High (400°F) | Violent bubbling | Burnt outside, raw inside | 1-2 minutes |
Regional Variations I’ve Tried
North Indian Style
In my travels through Punjab and Delhi, I learned that North Indian pakoras often include:
- Thicker batter consistency
- More generous use of green chilies
- Addition of fresh coriander leaves
- Serving with mint chutney
South Indian Style
The South Indian approach, which I picked up during my time in Bangalore:
- Thinner, crispier batter
- Curry leaves for aromatic flavor
- Coconut chutney as accompaniment
- Rice flour addition for extra crispiness
Bengali Style
My Bengali friends taught me their unique approach:
- Slightly sweet batter with a pinch of sugar
- Nigella seeds (kalonji) for distinctive flavor
- Mustard oil for frying
- Serving with kasundi (Bengali mustard sauce)
Troubleshooting Common Pakora Problems
Problem: Pakoras Absorbing Too Much Oil
Solution: This usually happens when the oil temperature is too low or the batter is too thin. I always ensure my oil reaches 350°F before adding pakoras and adjust batter thickness by adding more gram flour if needed.
Problem: Uneven Browning
Solution: Overcrowding the pan causes this issue. I never fry more than 4-5 pakoras at once, allowing each piece enough space to cook evenly.
Problem: Batter Not Sticking to Vegetables
Solution: Wet vegetables won’t hold batter well. I always pat vegetables completely dry with paper towels before coating.
Problem: Pakoras Turning Out Dense
Solution: Over-mixing the batter develops gluten-like proteins in gram flour, making pakoras heavy. I mix just until smooth and let the batter rest.
Nutritional Benefits and Health Considerations
| Nutrient | Amount per 100g | Health Benefits |
|---|---|---|
| Protein | 14-16g | Muscle building, satiety |
| Fiber | 8-10g | Digestive health |
| Iron | 4-5mg | Blood health |
| Folate | 180-200mcg | Cell function |
| Calories | 250-300 | Energy source |
Gram flour provides excellent plant-based protein and is naturally gluten-free, making pakoras suitable for various dietary needs. However, the deep-frying process adds calories, so I recommend enjoying them in moderation.
Serving Suggestions and Accompaniments
Traditional Chutneys
Mint Chutney: Fresh mint, coriander, green chilies, ginger, and lemon juice blended smooth
Tamarind Chutney: Sweet and tangy sauce made with tamarind pulp, jaggery, and spices
Coconut Chutney: Ground coconut with green chilies, ginger, and curry leaves
Modern Pairings
I’ve experimented with fusion accompaniments that work beautifully:
- Greek yogurt with herbs and spices
- Spicy mayo with sriracha
- Avocado-cilantro dip
- Tomato salsa with Indian spices
Beverage Pairings
Hot Beverages: Masala chai, ginger tea, cardamom coffee Cold Beverages: Lassi, buttermilk, lemonade, iced tea Seasonal Options: Hot chocolate during winter, coconut water in summer
Storage and Reheating Tips
Short-term Storage
Fresh pakoras taste best immediately, but I can store them for up to 2 days in the refrigerator in an airtight container.
Reheating Methods
- Oven method: 350°F for 5-7 minutes (best for crispiness)
- Air fryer: 350°F for 3-4 minutes
- Pan method: Light oil, medium heat, 2-3 minutes per side
- Microwave: Quick but results in soft texture
Freezing Instructions
I freeze uncooked battered vegetables on trays, then transfer to bags. They fry directly from frozen, adding 1-2 minutes to cooking time.
My Personal Tips for Pakora Success
After making thousands of pakoras over the years, here are my most valuable insights:
- Quality ingredients matter – I always use fresh gram flour and whole spices for the best flavor
- Patience with oil temperature – Rushing leads to greasy pakoras
- Seasonal vegetables work best – They’re fresher and more flavorful
- Small batches ensure quality – Better to fry multiple small batches than overcrowd
- Serve immediately – Pakoras lose their magic when they sit too long
Seasonal Pakora Calendar
| Season | Best Vegetables | Special Additions | Serving Notes |
|---|---|---|---|
| Spring | Tender onions, early potatoes | Fresh herbs | Light chutneys |
| Summer | Bell peppers, eggplant | Mint, coriander | Cool beverages |
| Monsoon | All vegetables | Extra spices | Hot chai |
| Winter | Cauliflower, spinach | Ginger, garlic | Hearty portions |
Questions and Answers
Q: Can I make pakoras without gram flour? I don’t recommend substituting gram flour as it provides the unique texture and flavor that defines pakoras. However, in emergencies, you can mix rice flour with a small amount of all-purpose flour.
Q: Why do my pakoras turn out soggy? Soggy pakoras result from oil that’s not hot enough or too much moisture in vegetables. Always ensure oil reaches 350°F and pat vegetables completely dry before coating.
Q: How can I make pakoras healthier? I sometimes make baked pakoras at 425°F for 15-20 minutes, flipping once. While not traditional, they’re lighter. You can also air fry at 375°F for 8-10 minutes.
Q: Can I prepare pakora batter in advance? Yes, I often make batter up to 4 hours ahead. The resting time actually improves flavor, but don’t let it sit longer than 6 hours as it may become too thick.
Q: What’s the best oil for frying pakoras? I prefer neutral oils like vegetable or canola oil for their high smoke point. Some traditionalists use mustard oil, but it has a strong flavor that might overwhelm delicate vegetables.
Q: How do I prevent pakoras from sticking to the pan? Ensure your oil is hot enough and avoid moving pakoras immediately after adding them. Let them develop a crust for 30-60 seconds before attempting to turn.
Q: Can I make gluten-free pakoras? Absolutely! Gram flour is naturally gluten-free, making traditional pakoras suitable for those avoiding gluten. Just ensure all your spices and additives are gluten-free certified.
Q: What vegetables should I avoid for pakoras? I avoid vegetables with high water content like tomatoes or cucumbers as they make the batter soggy. Very delicate vegetables like lettuce also don’t work well.
Q: How do I achieve restaurant-style crispiness? The secret lies in batter consistency, oil temperature, and not overcrowding. I also add a tablespoon of rice flour to my gram flour for extra crispiness.
Q: Can I make pakoras for a large crowd? Yes, but I recommend making them in batches and keeping finished ones warm in a low oven (200°F). This maintains crispiness better than trying to fry everything at once.
Making perfect pakoras is an art that improves with practice. Each batch teaches you something new about batter consistency, oil temperature, or timing. I encourage you to start with simple vegetables like onions or potatoes, master the basic technique, then experiment with your favorite combinations.
The joy of pakoras lies not just in their delicious taste, but in the process of making them – the anticipation as they sizzle in oil, the satisfaction of achieving that perfect golden color, and the happiness of sharing them fresh and hot with family and friends. Whether it’s a rainy evening or a festive celebration, pakoras have the magical ability to bring people together over good food and great conversations.