When I first discovered I needed to follow a gluten-free diet, I thought my days of enjoying warm, pillowy naan bread were over. After countless experiments in my kitchen, failed attempts, and moments of frustration, I finally cracked the code to creating the perfect gluten-free naan that rivals any traditional version. This recipe has become my go-to whenever I’m craving authentic Indian flavors without the gluten.
Let me share with you everything I’ve learned about making gluten-free naan that’s so good, even my gluten-eating friends prefer it over the regular version. This isn’t just another substitute recipe – it’s a complete transformation of traditional naan into something equally magnificent and accessible for everyone.
Understanding Gluten-Free Naan: What Makes It Special
Gluten-Free Naan: A traditional Indian flatbread adapted to exclude gluten-containing grains while maintaining the characteristic soft, chewy texture and distinctive flavor through alternative flour blends and binding agents.
Xanthan Gum: A natural polysaccharide that acts as a gluten substitute, providing elasticity and structure to gluten-free doughs.
Psyllium Husk: A natural fiber supplement that creates stretchy, elastic properties in gluten-free baking when combined with liquid.
Tapioca Starch: Also known as tapioca flour, this ingredient adds chewiness and helps create the perfect texture in gluten-free breads.
The secret to exceptional gluten-free naan lies in understanding how different flours behave and interact. Unlike traditional naan that relies on gluten for structure, my recipe uses a carefully balanced blend of alternative flours and binding agents that create an even better result.
The Science Behind Perfect Gluten-Free Naan
Making gluten-free naan isn’t just about swapping wheat flour for alternatives. The magic happens when you understand the role each ingredient plays in creating that perfect texture. I’ve spent years perfecting this balance, and the result is a naan that’s actually more flavorful and tender than many traditional versions.
The key lies in creating what I call the “gluten-free trinity” – a combination of binding agents, moisture enhancers, and texture builders that work together seamlessly. When mixed properly, these ingredients form a network that mimics gluten’s elasticity while adding unique flavors and nutritional benefits.
Essential Ingredients for My Gluten-Free Naan
Here’s my carefully tested ingredient list that creates consistently perfect results:
Flour Blend (Makes 3 cups)
- 1½ cups brown rice flour
- ¾ cup tapioca starch
- ¼ cup potato starch
- ¼ cup sorghum flour
- 2 teaspoons xanthan gum
- 1 teaspoon psyllium husk powder
Wet Ingredients
- 1 cup warm water (110°F)
- ⅓ cup plain Greek yogurt
- 2 tablespoons olive oil
- 1 tablespoon honey
- 1 large egg
Leavening and Flavor
- 2¼ teaspoons active dry yeast
- 1½ teaspoons salt
- 1 teaspoon baking powder
- ½ teaspoon garlic powder
- 2 tablespoons fresh cilantro, chopped
Detailed Nutritional Comparison
| Nutrient | Traditional Naan (per piece) | My Gluten-Free Naan (per piece) | Difference |
|---|---|---|---|
| Calories | 285 | 265 | -20 calories |
| Total Carbs | 52g | 48g | -4g |
| Fiber | 2g | 4g | +2g |
| Protein | 9g | 8g | -1g |
| Fat | 5g | 6g | +1g |
| Iron | 15% DV | 8% DV | -7% DV |
| Calcium | 120mg | 95mg | -25mg |
| Magnesium | 25mg | 45mg | +20mg |
| Potassium | 150mg | 180mg | +30mg |
Step-by-Step Instructions for Perfect Gluten-Free Naan
Preparing the Dough
I always start by activating my yeast in warm water with honey. This step is crucial because it ensures your naan will have that beautiful, airy texture. Mix the honey into warm water until dissolved, then sprinkle the yeast on top. Let it sit for 5-10 minutes until it becomes foamy and fragrant.
While the yeast activates, I combine all my dry ingredients in a large mixing bowl. Whisking them together thoroughly ensures even distribution, which prevents any gritty spots in the finished naan. The xanthan gum needs to be completely incorporated, or you’ll end up with chewy clumps.
Creating the Perfect Texture
Once my yeast mixture is ready, I create a well in the center of my flour blend and pour in all the wet ingredients. Using a wooden spoon, I start mixing from the center, gradually incorporating the flour until a shaggy dough forms. This usually takes about 2-3 minutes of steady mixing.
The dough will look quite different from traditional naan dough – it’s stickier and more cohesive. Don’t worry if it seems wet; gluten-free doughs typically have higher hydration levels. Cover the bowl with a damp cloth and let it rise in a warm place for 45 minutes to 1 hour.
Shaping and Rolling
After rising, the dough should have increased in size and feel slightly more elastic. I divide it into 8 equal portions using a kitchen scale for consistency. Each piece should weigh approximately 3.5 ounces.
Working with one piece at a time, I roll each portion between sheets of parchment paper dusted with rice flour. This prevents sticking while allowing me to achieve the traditional teardrop shape. Roll to about ¼ inch thickness – any thinner and they’ll become crispy rather than soft.
Cooking Techniques for Restaurant-Quality Results
Stovetop Method
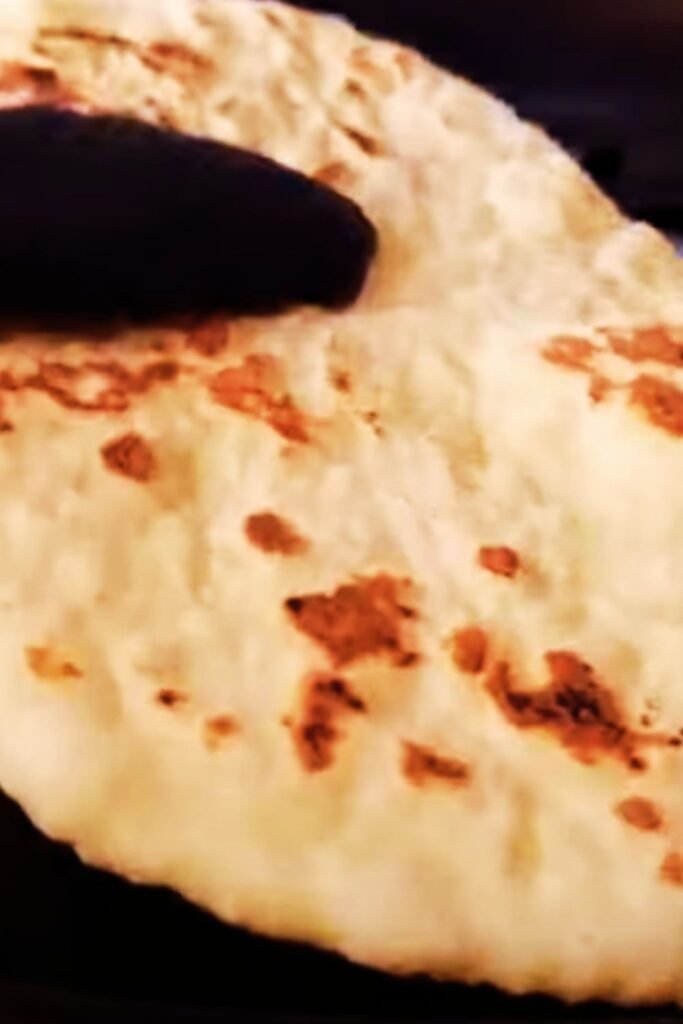
My preferred cooking method uses a cast-iron skillet heated over medium-high heat. I brush each naan lightly with olive oil before placing it in the hot pan. Cook for 2-3 minutes on the first side until bubbles form and the bottom develops golden-brown spots.
Flip carefully using a wide spatula and cook for another 1-2 minutes. The second side cooks faster, so watch carefully to prevent burning. I like to brush the cooked side with garlic butter while the second side finishes cooking.
Oven Method
For larger batches, I use my oven with a pizza stone preheated to 475°F. Place the shaped naan directly on the hot stone and bake for 8-10 minutes until puffed and lightly golden. This method creates exceptionally fluffy results.
Grill Method
During summer months, I love grilling naan over medium heat. The slight char adds incredible flavor that complements Indian dishes perfectly. Cook for 2-3 minutes per side, watching for those beautiful grill marks.
Troubleshooting Common Issues
| Problem | Cause | Solution |
|---|---|---|
| Dense, heavy texture | Insufficient rising time | Allow 60-90 minutes for rising in warm environment |
| Crumbly, falls apart | Not enough binding agents | Increase xanthan gum by ½ teaspoon |
| Too sticky to handle | High humidity or measurement error | Add rice flour 1 tablespoon at a time |
| Doesn’t puff up | Inactive yeast or low heat | Test yeast freshness; increase cooking temperature |
| Tough, chewy texture | Overmixing or too much xanthan gum | Mix just until combined; reduce xanthan gum slightly |
| Bland flavor | Insufficient salt or missing seasonings | Increase salt and add garlic powder, herbs |
Variations and Flavor Combinations
Garlic Herb Naan
I add 3 cloves of minced garlic and 2 tablespoons of mixed fresh herbs (cilantro, parsley, and chives) directly into the dough. The result is an aromatic naan that pairs beautifully with curry dishes.
Sweet Cinnamon Naan
For a dessert version, I substitute the garlic powder with cinnamon and add a tablespoon of coconut sugar to the dough. After cooking, I brush with melted butter and sprinkle with cinnamon sugar.
Dairy-Free Version
Replace Greek yogurt with coconut yogurt and use coconut oil instead of butter for brushing. The texture remains excellent while accommodating additional dietary restrictions.
Storage and Reheating Guidelines
Short-Term Storage
Freshly cooked naan stays soft for up to 2 days when stored in an airtight container at room temperature. I place a paper towel in the container to absorb excess moisture.
Freezing Instructions
These naan freeze beautifully for up to 3 months. I wrap each piece individually in plastic wrap, then store in freezer bags. Label with the date and cooking instructions for easy reference.
Reheating Methods
For the best results, I reheat frozen naan directly from the freezer in a 350°F oven for 5-7 minutes. Alternatively, wrap in damp paper towels and microwave for 30-45 seconds. The steam helps restore moisture and softness.
Serving Suggestions and Pairings
My gluten-free naan pairs wonderfully with traditional Indian dishes like chicken tikka masala, dal, and vegetable curry. The neutral flavor profile also makes it excellent for non-Indian meals – I often serve it alongside Mediterranean dishes or use it as a base for flatbread pizzas.
For appetizers, I cut the naan into triangles and serve with hummus, baba ganoush, or my homemade cilantro chutney. The sturdy texture holds up well to dipping without breaking apart.
Cost Analysis and Budget Considerations
| Ingredient Category | Cost per Batch | Cost per Naan | Notes |
|---|---|---|---|
| Flour Blend | $2.25 | $0.28 | Buy in bulk for savings |
| Wet Ingredients | $1.50 | $0.19 | Greek yogurt is the priciest component |
| Seasonings/Leavening | $0.75 | $0.09 | Initial investment, lasts many batches |
| Total Cost | $4.50 | $0.56 | Compared to $2-3 per store-bought |
Making your own gluten-free naan is significantly more economical than purchasing pre-made versions, plus you control all the ingredients and can customize flavors to your preference.
Advanced Tips for Perfect Results
Through my years of perfecting this recipe, I’ve discovered several techniques that consistently produce exceptional results. Temperature control is crucial – I keep my kitchen at 75-78°F during rising for optimal yeast activity. If your kitchen is cool, place the bowl near a warm (not hot) oven or on top of the refrigerator.
Measuring ingredients by weight rather than volume ensures consistent results every time. Gluten-free flours can vary significantly in density, so my recipe includes weight measurements for the most accurate results.
The order of mixing matters tremendously in gluten-free baking. Always combine dry ingredients first, then create a well for wet ingredients. This prevents lumps and ensures even hydration throughout the dough.
Questions and Answers
Q: Can I make this naan without eggs for a vegan version? I’ve successfully tested this recipe using a flax egg (1 tablespoon ground flaxseed mixed with 3 tablespoons water, let sit 5 minutes). The texture is slightly denser but still delicious. You can also try aquafaba (liquid from canned chickpeas) as an egg substitute.
Q: Why does my naan turn out gritty sometimes? Grittiness usually comes from insufficient mixing of the xanthan gum or using coarse rice flour. Make sure to whisk your dry ingredients thoroughly and consider sifting the flour blend if the problem persists. Also, ensure you’re using fine brown rice flour, not coarse-ground varieties.
Q: How can I tell if my yeast is still active? Active yeast will foam and bubble within 5-10 minutes when mixed with warm water and honey. If there’s no activity after 15 minutes, your yeast may be expired or the water temperature was incorrect. Water should feel warm but not hot to the touch (around 110°F).
Q: Can I prepare the dough ahead of time? Absolutely! I often make the dough the night before and let it rise slowly in the refrigerator. This actually improves the flavor. Just bring it to room temperature before shaping and cooking. The dough can be refrigerated for up to 24 hours.
Q: What’s the best way to achieve restaurant-style charred spots? For those beautiful charred bubbles, cook on higher heat and don’t press down on the naan while cooking. Let it puff naturally, and the bubbles will char slightly, creating that authentic appearance and smoky flavor.
Q: My naan doesn’t stay soft after cooling. What am I doing wrong? This usually indicates either overcooking or insufficient moisture in the dough. Try reducing cooking time by 30 seconds per side and ensure you’re measuring wet ingredients accurately. Brushing with butter immediately after cooking also helps maintain softness.
Q: Can I use this recipe to make other types of flatbread? Definitely! This versatile dough works wonderfully for pizza bases, focaccia-style breads, and even stuffed flatbreads. Just adjust the thickness and cooking time accordingly. For pizza, roll thinner and pre-bake for 5 minutes before adding toppings.
Q: Is it normal for gluten-free naan dough to be stickier than regular dough? Yes, this is completely normal and expected. Gluten-free doughs typically have higher hydration levels and different textures. Resist the urge to add too much flour, as this will make the final product dense. Use rice flour for dusting when rolling if sticking becomes an issue.
Q: How do I know when the naan is properly cooked? Properly cooked naan will be golden brown with some darker spots, feel firm but not hard when gently pressed, and sound hollow when tapped. Internal temperature should reach 190-200°F if you want to be precise.
Q: What should I do if I don’t have all the flours in your blend? While my specific blend gives the best results, you can substitute with a high-quality commercial gluten-free flour blend in equal amounts. Look for blends that already contain xanthan gum and adjust accordingly. Bob’s Red Mill 1-to-1 Baking Flour works well as a substitute.